Tank Drive OpMode
This step continues from the previous step. If you haven't completed the previous step you can switch to the tutorial02a branch.
To implement the Tank Drive OpMode we are going to copy the TwoMotorRobot from the FGCExamples project. As before, click on the TwoMotorRobot, and while dragging hold down the CTRL key. Drag it to the baconeers.opmode package.

Confirm that you are copying to org.baconeers.opmode
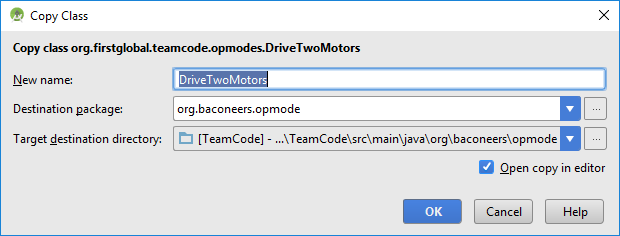
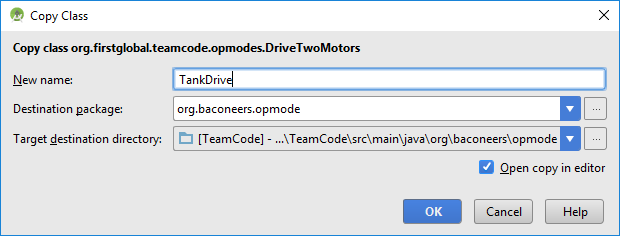
Change the name to TankDrive
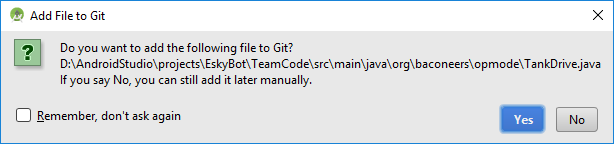
Add add to git
You will see that the copied class now shows some errors which are highlighted in red. This is because we copied the TwoMotorRobot class and renamed it to EskyBot. We also renamed the variable names of the motors in the EskyBot class. We just need to change all instances of TwoMotorRobot to EskyBot and change the motor0 and motor1 to leftDrive and rightDrive respectively.
When you rename TwoMotorRobot to EskyBot, AndroidStudio may complain that it can't resolve the symbol EskyBot.
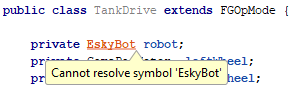
To fix this, put the cursor on EskyBot and press Alt-Enter and select Import class.

We should also change the name of the TeleOp from "TwoMotorRobot" to "Tank Drive".
There is still one error we need to fix. The import for the original class name is still in the imports and we need to remove it by deleting the whole line.

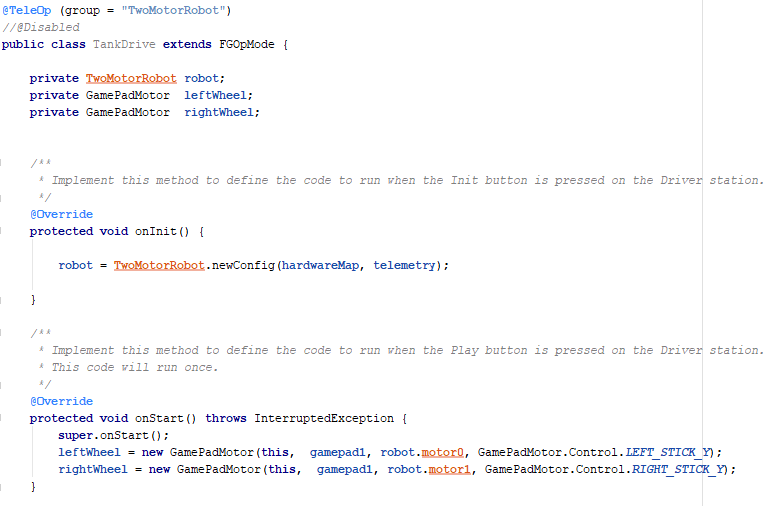
After you have done all that, there should be no more errors and it should look something like:
package org.baconeers.opmode;

import com.qualcomm.robotcore.eventloop.opmode.TeleOp;

import org.baconeers.configurations.EskyBot;
import org.firstglobal.FgCommon.FGOpMode;
import org.firstglobal.FgCommon.GamePadMotor;

@TeleOp (group = "Tank Drive")
//@Disabled
public class TankDrive extends FGOpMode {

    private EskyBot robot;
    private GamePadMotor  leftWheel;
    private GamePadMotor  rightWheel;


    /**
     * Implement this method to define the code to run when the Init button is pressed on the Driver station.
     */
    @Override
    protected void onInit() {

        robot = EskyBot.newConfig(hardwareMap, telemetry);

    }

    /**
     * Implement this method to define the code to run when the Play button is pressed on the Driver station.
     * This code will run once.
     */
    @Override
    protected void onStart() throws InterruptedException {
        super.onStart();
        leftWheel = new GamePadMotor(this,  gamepad1, robot.driveLeft, GamePadMotor.Control.LEFT_STICK_Y);
        rightWheel = new GamePadMotor(this,  gamepad1, robot.driveRight, GamePadMotor.Control.RIGHT_STICK_Y);
    }

    /**
     * Implement this method to define the code to run when the Start button is pressed on the Driver station.
     * This method will be called in a loop on each hardware cycle
     */
    @Override
    protected void activeLoop() throws InterruptedException {

        //update the motor with the gamepad joystick values
        leftWheel.update();
        //update the servo with the gamepad y/a button values
        rightWheel.update();


    }

}
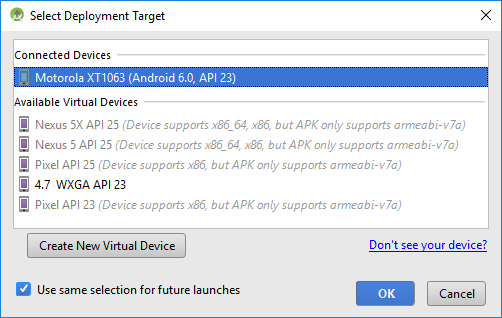
To run the Tank Drive OpMode, connect the RobotController via USB to your computer and click the AndroidStudio Run button which will build and install the RobotController app onto the RobotController.

Android Studio may ask you what device to deploy it on. Select your device and click OK.
If this is the first time you have connected the phone may ask you to accept the debug connection first.
After Android Studio has successfully deployed the RobotController app to the RobotController, unplug the RobotController from the computer and plug it into the EskyBot robot. Then use the Driver Station to select the Tank Drive OpMode, connect a game controller to the driver station and press Start + A to assign the game controller to gamepad A, Initialise the OpMode and then Run and you should now be able to control EskyBot in a tank configuration with the left and right joysticks.
